Seiten

Posts mit dem Label combos werden angezeigt. Alle Posts anzeigen

Sonntag, 4. April 2010

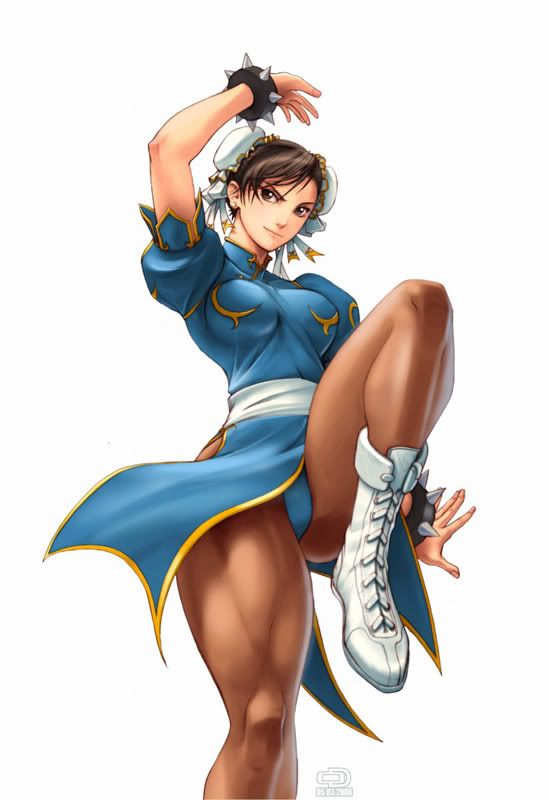
Street Fighter 4 Chun-Li Combos


Character Overview

Chun Li is mostly like her Capcom vs. SNK and SF3: Third Strike versions, although she has some Super Turbo elements. Her ground game is great, and she has a lot of poke attacks.

• Strengths •
+ Very good mix up game that will keep your opponent guessing.
+ Foot and move speed are fast, and her normal attacks have good priority.
+ Her move set is very diverse which helps her adapt to most situations.
+ Nice set of poke attacks and excellent defensive ability.

• Weaknesses •
- Chun-Li does not have consistent anti air options.
- Ultra attack is mediocre compared to the other fighters.
- Many of her moves can leave her open to counter attacks if not executed correctly.
Special Moves

A (2) next to an arrow means to hold the joystick in that direction for 2 seconds to 'charge' the move.

With moves that charge by holding back or down, you can use the diagonal positions to charge up as well. For example, if you're holding back, you can jump backwards or block low and still maintain your charge.
Light
90
Medium
120
Hard
120
EX
150

Joystick Joystick Joystick (Press Kick Button Rapidly)
• Lightning Legs (Hyakuretsu Kyaku) •
A solid chip damage move still, although the recovery after coming out it can leave you open to certain attacks. This also comes out quick enough that you can use it in some combos.

Chun's Lightning Legs are also good for knocking people out of Focus Attacks. Focus Attacks can only absorb one hit, but Lightning Legs hit multiple times in a short duration, so if you can anticipate a Focus Attack for your opponent — they'll eat some kicks to the face.
Light
50
Medium
60
Hard
70
EX
100

Joystick Joystick Joystick Joystick
• Kikouken (Fireball) •
This most closely resembles her Super Turbo fireball, and it's a good projectile because of its tricky speed and fast recovery time.

The Punch button pressed determines the speed, range and power of the projectile. The Light version goes almost a full-screen's distance and flies slow enough that you can follow the projectile and throw your opponent after they block it, like Guile.

Hard punch flies the shortest distance, but goes fastest and does the most damage. Medium is a mix of the two.

This move doesn't combo that well, EX version works much better in this regard.
Light
100
Medium
120
Hard
150
EX
200

Joystick Joystick Joystick Joystick Joystick Joystick Joystick
• Overhead Flip Kick (Hazan Shuu) •
Chun Li does the splits in midair and comes down with her legs out, this must be blocked high. It has a very quick recovery time, usually being safe from counter attacks, plus you can use it to go over the top of projectiles.

Your Overhead Flip Kick isn't a high priority attack and most other moves will counter this, so be careful when and where you use it.

Regardless, this is a great pressure/mix up tool. Your opponent must constantly be wary of you coming in with a fast attack that must be blocked high whenever you're somewhat close to them.
Light
200
Medium
210
Hard
240
EX
170

Joystick Joystick Joystick Joystick
• Spinning Bird Kick •
*Armor Breaking*
Chun Li flips upside down and spins with her legs split to attack the other fighter, and it's not very useful as it leaves you open to counter attacks more often than not. Bleh. The EX version on the other hand...

Joystick Joystick Joystick Joystick Joystick Joystick Joystick Joystick
• Command Combo Kicks •
This series of three moves starts out with Chun kicking midrange and leaning back a bit, the next attack (Medium Kick) with launch your opponent up into the air where you can finish them with multiple juggling kicks.

Note that the last part of the move does NOT require a charge motion and that these moves are only available one after another. So you can't start the first move and immediate going into the Juggling Jumping Kicks.

If your opponent is in the corner you can juggle them after finishing this off with her Super or Ultra.

Joystick Joystick Joystick (In the air)
• Air Throw •
When you're close to the other fighter in the air, do a normal throw command. This can be a very useful move because it can't be reversed and the range is pretty good. Some think this is one of Chun's best anti air moves.
EX Moves
Light
90
Medium
120
Hard
120
EX
150

Joystick Joystick Joystick (Press Two Kick Buttons Rapidly)
• EX-Lightning Legs (Hyakuretsu Kyaku) •
More damage and hits than the normal version and you can juggle after landing this.
Light
50
Medium
60
Hard
70
EX
100

Joystick Joystick Joystick Joystick
• EX-Fireball (Kikouken) •
This version hits twice, comes out faster and goes full screen distance. It's usually best off to use this in combos instead of her normal fireball.
Light
100
Medium
120
Hard
150
EX
200

Joystick Joystick Joystick Joystick Joystick Joystick Joystick
• EX-Overhead Flip Kick (Hazan Shuu) •
Like the normal version, but it does more damage, comes out quicker and knocks down when it hits.
Light
200
Medium
210
Hard
240
EX
170

Joystick Joystick Joystick Joystick
• EX-Spinning Bird Kick •
*Armor Breaking*
Generally regarded as one of Chun's best moves because of its priority and invincibility. This move does NOT have vacuum-like properties like in SF3, but it's still a great move and can be used to counter some air attacks.
Super and Ultra Moves
Super
340
Ultra
367-510

Joystick Joystick Joystick Joystick Joystick Joystick
• Senretsu Kyaku (Super Lightning Leg Kicks) •
Not a very good Super, and most players feel like you're better off using Chun Li's EX attacks instead. It does not travel full screen, and if the opponent blocks it in the corner you're wide open to counter attacks. Also if this hits the other fighter in the air, most of the hits won't land, so it's really only effective against grounded opponents.

This does have some use in guaranteed hit situations and combos, but use it very sparingly.

Joystick Joystick Joystick Joystick Joystick Joystick
• Housenka (Ultra Lightning Leg Kicks) •
*Armor Breaking*
This almost flies a full-screen's distance and goes through fireballs, making it a very deadly to projectile throwers. But like her Super, if blocked it leaves you open to counter attacks so you must be careful.

You can use the threat of Chun's Ultra to keep projectile characters from throwing them out continuously. After one or two hits from this, they'll learn to use different tactics when you have Revenge meter.

Like her Super, don't use this against jumping characters because most of the hits will not land.

Her Ultra has a few frames of "start up" animation before it hits, so work on your timing to counter projectiles. You almost need to predict when they're coming out.
Combos

• Jumping Hard Kick, Crouching Hard Punch cancel into EX-Kikouken, cancel into Level 2 Focus Attack, Dash Cancel, Command Combo Kicks •
Powerful combo. You can also do just the early parts of this sequence for some good damage if you have trouble pulling the whole thing off.

• Crouching Light Kick, link into Crouching Light Punch, link into Crouching Medium Kick, cancel into EX-Kikouken •
Solid combo. Easy to confirm you've hit with this and nail the other fighter with an EX-Fireball.

• Jumping Hard Punch 2x, Standing Medium Punch, Cancel into Hard Punch Fireball, Cancel into Super Lighting Legs •
Pretty solid way of landing your Super in a match, although the damage on this is good even without the Super on the end. Some people prefer a Standing Hard Punch for extra damage instead of Standing Medium Punch, but the Standing Mediums hit twice, giving you more time to charge for your Fireball.

• Crouching Light Kick 2x, Cancel into EX-Lightning Legs, juggle with EX-Lighting Legs, juggle again with EX-Lighting Legs (if opponent is in corner) •
A great ground combo and a rough price for your opponent to pay for getting hit with a Crouching Light Kick.

• Jumping Hard Kick, Crouching Light Kick 2x-4x, Cancel into EX-Lightning Legs, juggle with Ultra if opponent is in corner •
A variation on the above combo. Unless your opponent is close to the corner you won't connect a lot of hits from your Ultra, so you're best off not using it outside of this situation unless you only want to take off a small amount of life. You can also sub in pretty much any one of Chun Li's jump in attacks for the Jumping Hard Kick.

• Jumping Hard Punch 2x, Crouching Hard Punch, Cancel after first hit into Medium or EX-Spinning Bird Kick •

• Catch airborne opponent with Jumping Hard Punch 2x, juggle with EX-Spinning Bird Kick or EX-Lighting Legs •
Normal Moves

Note this is not a complete list of all of Chun Li's normal moves, just the ones we think are noteworthy.

Joystick Joystick Joystick
• Flip Cross Up Kick (Kouhou Kaiten Kyaku) •
Chun Li flips forwards and kicks with both legs in the opposite direction. If done around sweep range, she will jump over the other fighter's head and cross them up.

Joystick Joystick Joystick
• Crouching Medium Kick •
Chun's Crouching Medium Kick is back, and still very good. You can use this move to cancel into her Fireball, Super and Lightning Legs.

Joystick Joystick Joystick (In the air)
• Head Stomp •
The old school Chun Li move is back, and it's not terribly useful, but sometimes a situation arises where it makes sense to use this.

Joystick Joystick Joystick
• Backflip Kick •
Chun Li flips backwards and sticks her knee out.

Joystick Joystick Joystick
• Hop Kick •
This makes you hop forward quickly and kick your foot out. The recovery time for this move is very short and you can usually follow it up with another attack before your opponent can counter.

Joystick (In the air)
• Wall Jump •
When you're close to a wall, press in the opposite direction of it, and you'll jump off.
Video: Chun Li Trial Challenge: Street Fighter 4

Walkthrough: How to complete Chun Li's Trials in Challenge Mode

Note: Chun Li has some of the most difficult Trials in the entire game, but going through all 10 of them will give you a pretty good idea what her core combos are and how to use most of the moves.

While some of the Links and Cancels are difficult to pull off, getting through these will really help you improve your execution, so try your best and keep practicing.

If you're struggling with understanding any of these notes, make sure you check out the video over on the right so you can see the moves being executed.

Completing this is one heck of a ride, so if you manage to get through all ten, your execution is outstanding.

Street Fighter 4 Cammy Combos


Character Overview

Cammy might best be thought of as a miniature wrecking ball. She has a number of devastating combos and can absolutely destroy players in a short period of time.

She's best played as an in your face, offensive rush down character. Her foot speed coupled with a nice move set can make her a very formidable character in the right hands.

Cammy is underrated by most players.

• Strengths •
+ Exceptional foot speed. Cammy is one of the fastest characters in the game.
+ Some very, very powerful combos.
+ An outstanding Ultra move. Has a couple of ways she can set this up after landing an attack.
+ One of the best offensive rush down characters. Very hard to stop once she gets going.
+ Flies below the radar. Very few players regularly play against Cammy, so they may not be familiar with her bag of tricks.
+ Has many tools for dealing with projectile throwing characters.

• Weaknesses •
- Below average stamina.
- Great defensive players can give her problems, keeping her outside of her effective zone.
- Technical character. You need to have excellent execution skills to play her at a high level.
- Jumping Light Kick is crap cross up move.
Special Moves
Light
100
Medium
120
Hard
140
EX
160

Joystick Joystick Joystick Joystick Joystick
• Spiral Arrow (Cannon Drill) •
Cammy spins herself forward along the ground. The Kick button pressed determines the distance this travels and amount of life it takes off.

This attack works very well in combos. Cammy can set it up by confirming she's hit with a string of Crouching Light attacks and then follow those with her Spiral Arrow, taking off a nice chunk of health and scoring a knock down.

Your Spiral Arrow is not an attack you'll want to spam through the whole match though, as it can be punished on block. Since this must be blocked low however, you can catch an opponent who's standing to counter your barrage of offensive moves with the occasional Spiral Arrow.

Coupled with Cammy's other Special Moves, this is a very good attack.
Light
120
Medium
140
Hard
150
EX
160

Joystick Joystick Joystick Joystick Joystick
• Cannon Spike (Burst Kick) •
Your version of the Dragon Punch (Shoryuken). This has a bad habit of whiffing ducking players if you're not close enough, which makes it extremely easy to punish. However, on block, Cammy flies away a solid distance, which can still be punished, but the window to do so is reasonably small, so if your enemy isn't expecting it, you may get away.

This is a wicked move though. As long as you time your Cannon Spike correctly, it will beat out most other moves in the game when it's in its first few frames of animation. It's only in the latter parts of the move when Cammy's hitbox is more susceptible to other attacks, meaning that if you time it correctly, you should rarely trade hits.

If you ever need to get an opponent off of you, this will do the trick.
Light
160
Medium
160
Hard
160
EX
160

Joystick Joystick Joystick Joystick Joystick Joystick Joystick
• Quick Spin Knuckle (Spinning Backfist) •
*Armor Breaking*
Light
100
Medium
100
Hard
100
EX
120

Joystick Joystick Joystick Joystick Joystick Joystick Joystick
Joystick Joystick Joystick when close to throw
• Hooligan Combination (Frankensteiner) •
Note, the damage numbers to the right are for Cammy's Slide Kick part of the Hooligan Combination. Her throw always does 130 damage, unless you grab your opponent in the air, then it does 140 damage.
Light
70
Medium
70
Hard
70
EX
80

Joystick Joystick Joystick Joystick Joystick
(While jumping forward in the air)
• Cannon Strike •
EX Moves
Light
100
Medium
120
Hard
140
EX
160

Joystick Joystick Joystick Joystick Joystick
• EX-Spiral Arrow (Cannon Drill) •
This does a bit more damage than the Hard Kick version (160 if you land both hits, compared to Hard Kick which does 140). It also travels through all projectiles.

Since this doesn't have full screen range, your ideal placement when you want to hit your opponent on reaction to them tossing out a fireball is about 3/4ths of the way out or closer.

Because Cammy has great mid-range and up close options, your opponent will often use projectiles to give them more breathing room. Making them think twice about throwing out random fireballs will give you better spacing and set up more opportunities for you to abuse Cammy's outstanding footspeed.
Light
120
Medium
140
Hard
150
EX
160

Joystick Joystick Joystick Joystick Joystick
• EX-Cannon Spike (Burst Kick) •
Of all of the things you should be spending your EX meter on, this move won't often be one of them. It has an extra frame of invulnerability (6) over the Hard and Medium Kick versions (5), and it does slightly more damage as well, but it's not all that different besides that.

Considering what you can do with Focus Attack Dash Cancels (FADCs) and a few of Cammy's other EX moves, you're best off rarely using this attack and spending your EX meter else where. About the only time you'll want to throw this out there is for reversal situations where you absolutely want the most invulnerability possible.
Light
160
Medium
160
Hard
160
EX
160

Joystick Joystick Joystick Joystick Joystick Joystick Joystick
• EX-Quick Spin Knuckle (Spinning Backfist) •
*Armor Breaking*
This is almost identical to the Medium Punch version, except for one important attribute — it's invincible during it's start up frames of animation.

Because you can juggle with Cammy's Ultra after you land her Spin Knuckle, if your opponent eats this once, it can lead to a big damage combo. And even if they block, you should be safe from counter attacks.

The problem is Cammy can still be thrown out of this or hit with an attack before she actually sticks out her hand — she takes awhile to actually get to a hittable state.

As such, this is more of a counter/physic move than anything else. If you can predict what your opponent is going to do, blowing through their move and juggling with your Ultra is awesome. And considering the pressure a good Cammy player can apply, you can make your opponent make some mistakes or get into some bad habits to set this up.

What you're left with is a streaky move. Against some players you may have quite a few chances to set this up, against others who play a bit smarter and carefully, you probably won't be able to use this very often.
Light
100
Medium
100
Hard
100
EX
120

Joystick Joystick Joystick Joystick Joystick Joystick Joystick
Joystick Joystick Joystick when close to throw
• EX-Hooligan Combination (Frankensteiner) •
Cammy's EX-Hooligan Combination has a higher arc, travels faster and will "track" based on whatever position your opponent is standing at, and these properties make it a pretty good move.

You can use it from point blank of full-screen's distance to keep the other fighter guessing. Players who are used to having Cammy fly at a lower to the ground arc with her Hooligan Combination can be caught off guard to see her coming much faster and at different angle, giving you an opening to grab them or set up her slide.

All of the same tricks that work with her regular Hooligan Combination apply here. Also the slide after an EX-Hooligan does a bit more damage over the regular versions.
Light
70
Medium
70
Hard
70
EX
80

Joystick Joystick Joystick Joystick Joystick (While jumping)
• EX-Cannon Strike •
Unlike the normal version of Cammy's Cannon Strike, you can do this while jumping straight up or backwards. This enables you to do a "Tiger Knee" like motion while you're still on the ground so that the instant you jump, your EX-Cannon Strike comes out. Here's a visual.

Joystick Joystick Joystick Joystick Joystick Joystick So instead of jumping and doing this move, the last input counts as the jump, but all of the inputs before also count towards the motion, giving you an instant Cannon Strike. Note, you have to perform this fairly quickly or the game won't register the motion for your Strike.

This technique opens the door for several tricks from Cammy.
Super and Ultra Moves
Super
400
Ultra
379-540

Joystick Joystick Joystick Joystick Joystick Joystick Joystick Joystick
• Spin Drive Smasher (Super) • *Armor Breaking*

Joystick Joystick Joystick Joystick Joystick Joystick Joystick Joystick
• Gyro Drive Smasher (Ultra) • *Armor Breaking*
Combos

• Jumping Hard Kick, Crouching Light Kick, Standing Light Kick, Crouching Light Kick, Cancel into Spiral Arrow •
Easy combo, does good damage and sets up some other tactics because your opponent is stuck blocking 3 light attacks.
Video: Cammy Trial Challenge: Street Fighter 4

Video walkthrough of Cammy's Trial Challenges in Street Fighter 4. Watch ►

Movie courtesy of Kalelulen4
Walkthrough: How to complete Cammy's Trials in Challenge Mode

Going through all 10 of Cammy's Trials will give you a pretty good idea what her core combos are and how to use most of the moves.

While some of the Links and Cancels are difficult to pull off, getting through these will really help you improve your execution, so try your best and keep practicing.

If you're struggling with understanding any of these notes, make sure you check out the video over on the right so you can see the moves being executed.

Note, all of the Cannon Strike combos must be landed VERY deep, or you won't combo. Spacing on Cammy's Trials is critical.
Normal: Trial 1 • Standing Medium Kick.
• Crouching Medium Kick.
• Towards + Light Punch and Light Kick (Throw).
• Backwards + Light Punch and Light Kick (Throw).
• Jump, Towards + Light Punch and Light Kick (Throw) while your opponent is in the air. Normal: Trial 2 • Cannon Spike (Front Kick).
• Cannon Drill (Spiral Arrow).
• Spinning Backfist (Quick Spin Knuckle).
• Hooligan Throw, Press Towards + Light Punch and Light Kick (Throw) when close.
• Cannon Strike.
• Spin Drive Smasher (Super).
• Gyro Drive Smasher (Ultra).
Normal: Trial 3 • Standing Medium Punch, Cancel into Cannon Spike.
• Standing Hard Punch, Cancel into Cannon Spike.
• Crouching Medium Kick, Cancel into Cannon Drill.
• Crouching Medium Punch, Cancel into Cannon Drill. Normal: Trial 4 • Jumping Hard Kick, Standing Hard Kick, Cancel into Cannon Spike.
• Jumping Hard Kick, Crouching Medium Kick, Cancel into Hard Kick Cannon Drill, Cancel into Spin Drive Smasher (Super).
• Hooligan Throw (Press No Buttons so a Slide comes out), Cancel Slide into Spin Drive Smasher (Super).
• Spinning Backfist, juggle with Ultra.
Normal: Trial 5 • Standing Medium Punch, Link into Crouching Medium Kick.
• Crouching Hard Punch, Link into Crouching Medium Kick. Hard: Trial 1 • Jumping Hard Kick, (Close Range) Standing Light Kick, Link into Standing Light Punch, Link into Crouching Light Kick, Cancel into Cannon Drill, Cancel into Spin Drive Smasher (Super).
Hard: Trial 2 • Jumping Hard Kick, (Close Range) Standing Light Kick, Link into Standing Medium Punch, Link into Crouching Medium Kick, Cancel into Cannon Drill, Cancel into Spin Drive Smasher (Super). Hard: Trial 3 • (Deep) Cannon Strike, (Close Range) Standing Light Kick, Link into Standing Hard Punch, Cancel into Cannon Spike.
Hard: Trial 4 • EX-Cannon Drill (Only hit once), juggle with Cannon Spike, Cancel into Focus Attack, Backwards Dash, juggle with Ultra. Hard: Trial 5 • (Deep) Cannon Strike, (Close Range) Standing Hard Punch, Cancel into Cannon Spike, Focus Attack Dash Cancel, juggle with another Cannon Spike, Cancel with Focus Attack, Backwards Dash, juggle with Ultra.

Samstag, 3. April 2010

Street Fighter 4 Akuma Combos


Character Overview

The Demon is back and he's powerful. Akuma is most similar to his Street Fighter 3 Third Strike version. He does a lot of damage with his moves and some big time combos he can throw out there during the match.

But he takes more damage when he's hit than any character in the game besides Seth, so eating a few large combos will wipe you out.

Akuma has three handy projectiles in which he can use to help control the match, and his damage potential is still very, very good.

He's versatile in that he can apply a lot of offensive pressure or kick back and use his excellent Fireballs to frustrate some opponents.

• Strengths •
+ Powerful character, takes off a lot of damage when he hits.
+ Excellent offensive options. Lots of ways to mix up his attack plan.
+ Medium and Hard Red Fireballs act like an EX-Projectile.
+ Air Fireball can set up some great pressure situations.
+ You can easily combo after landing a Demon Flip Dive Kick.

• Weaknesses •
- Horrible defensive (stamina) ranking. Can die very quickly.
- Gets dizzied easily.
- Red Fireballs have a terrible recovery time, can leave you wide open.
Setting up your Light Hurricane Kick

Landing Akuma's Light Hurricane Kick sets up a Hard Punch Shoryuken to finish off your opponent, and this sequence does fairly good damage.

You can Cancel into your Light Hurricane Kick after a couple of Crouching Light Punches or Kicks — this gives you time to confirm you've hit your opponent and launch into a devastating combo. This set up lets Akuma apply a lot of offensive pressure.

But the timing may throw some people off initially. For example, when you do a Crouching Light Punch, Crouching Light Kick and Cancel into a Hurricane Kick, if you do the Crouching Light Kick too quickly, you won't be able to Cancel.

Instead you'll want to time the Crouching Light Kick in this sequence so it's more like a Link. Delayed enough that you can Cancel, but also still combo into your moves.

The timing on this can be tricky at first, but being able to land a huge combo because your opponent does not block a Crouching Light Kick is HUGE. Your best bet is to go into practice mode to learn how to combo this consistently.

It will make you a much better Akuma player.
Cross up and cheese tactics

Akuma has a really good cross up move with Jumping Medium Kick. The range is nice, it does solid damage, plus it's easy to combo into other attacks after landing it.

A common tactic for Akuma is to cross up the other player as he gets up off the ground. If they block the resulting attack, throw out either one or two Crouching Light Punches and go for a throw.

If they don't block the cross up, follow up with two Crouching Light Punches, Link into Crouching Medium Kick and do a Fireball, EX-Fireball if you have Super meter, for a 5-hit combo.

Bouncing back and forth between these two tactics after you cross the other fighter up will make most good players attempt to Tech your throws, or try and hit you back with a few Light Punches or Kicks. When this starts happening, after your first Crouching Light Punch pause for a split-second and then go into your Crouching Medium Kick, then Cancel into Fireball.

If the other fighter is attempting to tech or throw out a move, you should hit them, and if they block, you've taken a small amount of chip (block) damage off.

The tactics above work wonders because you're putting yourself in a real good position to consistently cause damage whenever you cross the other fighter up.
Special Moves
Light
60
Medium
60
Hard
60
EX
120

Joystick Joystick Joystick Joystick Joystick
• Fireball (Gou Hadouken) •
This is very similar to Ryu and Ken's fireball. You'll use this to control spacing and pester opponents who have a difficult time dealing with projectiles.

Do not avoid this move in favor of Akuma's other projectiles. It's quick and there's many times in a match where this will work better than his Red or Air Fireballs.
Light
40
Medium
40
Hard
40
EX
80

Joystick Joystick Joystick Joystick Joystick (In the air)
• Air Fireball (Zankuu Hadouken) •
The punch button pressed determines the angle and speed of your Air Fireball. Light Punch flies the most vertical and goes slowest, while Hard flies forward the most and is the fastest. Medium is a mix of the two.

Because of the speed and angle of the Light Punch Fireball, many Akuma players will use it at the peak of their jump against opponents in the corner as they stand up. Then they'll land and follow up with a low attack, or his overhead hit as the fireball is coming in making it difficult to block correctly.

Because Akuma briefly stops moving when he throws this in the air, you can also use this to alter the trajectory of your jump to avoid landing on projectiles or limbs.
Light
50
Medium
100
Hard
150
EX
180

Joystick Joystick Joystick Joystick Joystick Joystick Joystick
• Red Fireball (Shakunetsu Hadoken) •
This comes out much faster than the version seen in Street Fighter 3 Third Strike. Akuma briefly powers up, and then unleashes a fireball. Hard Punch hits three times, Medium hits twice and Light hits once.

This works much like an EX-Fireball in that the Medium Punch version it will absorb another projectile and keep going through to hit your opponent. The Hard Punch Fireball will absorb both hits of an EX-projectile and continue through to hit the other fighter.

The drawback is it has almost double the start up time and a bit more recovery than Akuma's regular Fireball, so you have to time your execution on this or you'll be setting yourself up for a big jump in combo.

Against top quality opponents, you're not going to have a lot of chances to throw this out there unless they're projectile happy, or getting up off the ground so you can score some chip damage.
Punch
110
Kick
70
Slide
100
Throw
150

Joystick Joystick Joystick Joystick Joystick
• Demon Flip (Hyakki Shuu) •
The button pressed determines how far Akuma flips forward. Light flies the shortest distance, while Hard travels the farthest.

While you're in the air during the Demon Flip animation, you can do the following:

* Kick button: Dive Kick — A GREAT move, because no matter when you initiate the Dive Kick, whenever you land it, you should always have enough time to go into a combo. This even works against tall characters like Sagat and Zangief. You can hit them in the top of the head and still combo. Nasty.
* Punch button: Hammer Fist An armor breaking move that knocks down when it lands. Can he handy to set up a cross situation.
* Light Punch and Light Kick: Throw — You'll need to pretty close to your opponent to throw them. Does a bit more damage than a normal grab, and it's a good mix up move to add in there when they may be expecting a Dive Kick instead.
* Slide Kick: Pressing nothing at all will make Akuma do a fast slide kick when he lands. Hits low, and will score a knock down.

Light
70
Medium
120
Hard
160
EX
200

Joystick Joystick Joystick Joystick Joystick
• Hurricane Kick (Tatsumaki Zankuu Kyaku) •
Knocks down if it hits, and the Medium and Hard versions of this move can hit multiple times.

The Light version can be used to juggle the other fighter if your next move has a short recovery time. For example, you can hit them with a Light Kick Hurricane Kick and go into a Hard Punch Shoryuken for a 4 hit combo.
Light
60
Medium
140
Hard
160
EX
80

Joystick Joystick Joystick Joystick Joystick (In the air)
• Air Hurricane Kick (Tatsumaki Zankuu Kyaku) •
Light
130
Medium
160
Hard
190
EX
190

Joystick Joystick Joystick Joystick Joystick
• Shoryuken (Dragon Punch) •
A high priority attack. The Punch button pressed determines the strength, range and number of hits for this move.

Light Punch has the smallest range, only hits once and does the least damage, but if you miss with it you're not as open to counter attacks as the heavier versions. This is good for countering pokes and tick throws.

Hard Punch has the longest range, hits 3 times and does the most damage. It's good for finishing off juggles and combos, and as an anti air move. If you miss with it though prepare to take a lot of damage.

Medium Punch is a mix of both Light and Hard version. It hits twice.

Joystick Joystick Joystick Joystick Joystick or Joystick
• Teleport (Ashura Senkuu) •
The joystick motion may be reversed with either 3x punch or kick to teleport backwards.

The punch version of this move will take you forward a full-screen's distance away, and the kick takes you about halfway.

This move has a much faster recovery time than in SF3 Third Strike, making it more difficult to counter-attack Akuma as he's coming out of it.

Joystick Joystick Joystick (In the air)
• Dive Kick •
You must be jumping forward and near the peak of your jump to execute this move.
EX Moves
Light
60
Medium
60
Hard
60
EX
120

Joystick Joystick Joystick Joystick Joystick
• EX-Fireball (Gou Hadouken) •
This attack will absorb one normal projectile and keep flying through to hit your opponent. It hits twice, and it's mainly useful for combos and the like. Sometimes handy for pressure situations and in projectile battles, because it comes out pretty quickly.

Each hit of Akuma's EX Fireball does 60 damage, which is the same amount a regular Fireball does.

If you land this with your opponent in the corner, you can juggle with a Hard Punch Shoryuken after wards if you're close.
Light
40
Medium
40
Hard
40
EX
80

Joystick Joystick Joystick Joystick Joystick
• EX-Air fireball (Zankuu Hadouken) • (In the air)
This throws out two fireballs, somewhat like Shin Akuma in previous Street Fighter games. It's not a fireball that hits twice like other character's EX moves.

These come out at the same angle as the Medium and Hard Punch Air Fireballs, and start up and recovery are faster than Akuma's regular Air Fireball.

The damage if both land is... OK, but it is an excellent offensive pressure tool. Throws these at a downed opponent as they're standing and then get in close to them. If these hit, go right into a combo and if they block the Air Fireballs attempt a throw.

A simple strategy, but an excellent one regardless.
Light
50
Medium
100
Hard
150
EX
180

Joystick Joystick Joystick Joystick Joystick Joystick Joystick
• EX-Red Fireball (Shakunetsu Hadoken) •
Hits three times like the Hard Punch version, but it has slightly faster recovery time. Recovers in 50 frames instead of 63. It also does 180 damage instead of 150 for the Hard Punch version. This attack is only really useful when you need the extra damage.
Punch
110
Kick
70
Slide
100
Throw
150

Joystick Joystick Joystick Joystick Joystick
• EX-Demon Flip (Hyakki Shuu) •
This move "tracks" based on wherever your opponent is. You can use it from full-screen's distance to punish Fireball throwers. Works from pretty much any distance, although from point blank range it can be difficult to land your Dive Kick.

Also Akuma travels faster than a normal Demon Flip, so he can get into his next attack a bit quicker.

This is a pretty solid move, especially for the element of surprise from long distances when your opponent wouldn't otherwise be afraid of being hit.
Light
70
Medium
120
Hard
160
EX
200

Joystick Joystick Joystick Joystick Joystick
• EX-Hurricane Kick (Tatsumaki Zankuu Kyaku) •
The EX-Hurricane kick makes you spin in place and will vacuum in the other fighter if they're close enough, hitting multiple times.

This is Akuma's most damaging EX-move, so it's an ideal combo ender, although it only does 10 more points of damage than a Hard Punch Shoryuken.

It's also safe from counter attacks if blocked.
Light
60
Medium
140
Hard
160
EX
80

Joystick Joystick Joystick Joystick Joystick (In the air)
• EX-Air Hurricane Kick (Tatsumaki Zankuu Kyaku) •
Can be a decent anti air because of the damage, but you basically have to predict the jump in because Akuma stops all movement and spins in place. Not too many uses for this move in a match unless you're great at predicting jump ins.
Light
130
Medium
160
Hard
190
EX
190

Joystick Joystick Joystick Joystick Joystick
• EX-Shoryuken (Dragon Punch) •
This does the same amount of damage as a Hard Punch Shoryuken, but it offers frames of invulnerability, so it makes it more desirable for some Reversal and Anti Air situations.

You probably won't be using this too much, but it is a handy move in some situations.
Super and Ultra Moves
Super
330
Ultra
456-600

Joystick Joystick Joystick Joystick Joystick
• Super Raging Demon (Shun Goku Satsu) • *Armor Breaking*
This move comes out FAST. Faster than in previous games. It does about 30% damage (character dependent), beats out most normal attacks and goes about a full screen's distance, but it does not go through fireballs.

Without doing a level 2 or 3 Focus Attack, there's no known way to combo into this move.

Some say this Super shouldn't be used pratically ever because the damage is weak and you're better off using Akuma's EX moves, but because of its speed some players find it handy.

Joystick Joystick Joystick Joystick Joystick
• Ultra Raging Demon (Shun Goku Satsu) • *Armor Breaking*
Akuma's Ultra travels further than full screen's distance, does about 60% damage when fully charged, it's very powerful.

Like his Super, there isn't a known way to combo into this without doing a crumpling Focus Attack.

This can be a difficult move to land if you're playing against a good player, because in many cases they can just jump away. So you'll want to use this in instances where your opponent cannot recover in time from whatever they're doing. The other fighter attempting a throw, or trying to cross you up can give you good opportunities to land this move, because you can time your Raging Demon to grab them the moment they land or attempt to toss you.

Sometimes as you're getting up off the ground, the other fighter may be trying to stick out a meaty move or throw a Fireball. Time this to go right through it and make them pay a heavy price for being foolish.

Also works good after a missed Shoryuken or any attack that leaves them wide open.

If you're having trouble executing the Raging Demon, make sure you're doing the movements in the correct order. It seems obvious, but many players will press the Light Kick button before they press Back on the controller.

You don't have to be lightning quick to pull off this move, simply tapping out the motion in a reasonably fast matter will get it out there — the most important part is not doing things out of order.
Combos

• Jumping Hard Kick, Standing Hard Punch, Cancel into Light Kick Hurricane Kick, juggle with Hard Punch Shoryuken •
Akuma's bread and butter combo. Great damage and not too difficult to pull off.

• Jumping Hard Kick, Crouching Light Punch 2x, Link into Crouching Medium Kick, Cancel into Hard Punch Fireball •
You can drop the two Crouching Light Punches from this combo if you have difficulty pulling it off.

• Crouching Light Kick, Crouching Light Punch 2x, Cancel into Light Punch Shoryuken •
You can skip the Crouching Light Kick and use a Hard Punch Shoryuken instead after the Crouching Light Punches.

• EX-Air Fireball, Crouching Light Kick, Link into Crouching Light Punch, Cancel into Light Kick Hurricane Kick, juggle with Hard Punch Shoryuken •
Another way to land the core part of Akuma's bread and butter combo.

• Standing Hard Kick, Link into Crouching Light Kick, Cancel into Light Hurricane Kick, juggle with Hard Punch Shoryuken •

• (Opponent in corner, close range) EX-Fireball, juggle with Hard Punch Shoryuken •
You can also add in a few moves before the EX-Fireball, the key here is being close enough to hit with your Shoryuken as your opponent is falling back.
Normal Moves

Note this is not a complete list of all of Akuma's normal moves, just the ones we think are noteworthy.

Joystick
• Standing Hard Kick •
One of Akuma's best normal moves because of the combo potential and speed. Link into a Crouching Light or Medium Kick after wards which sets up some good combos.

Also following up with this move after an Air Fireball is a good tactic to put pressure on your opponent.

Joystick Joystick Joystick
• Overhead Chop •
Akuma's classic Overhead Chop is back. Hits twice.
Unlocking and Selecting Akuma in the arcade version

To unlock Akuma there are two codes arcade machine owners can enter in the settings.

CPU Akuma: C5HSP3GN
Playable Akuma: CHNB9FGC

After the playable Akuma code has been entered, go to any character on the bottom row and press down or any character on the top row and press up. The cursor will disappear and Akuma will be the selected person.